You know the moment. It’s Monday, the kitchen counter is wiped clean, and it looks great. By Wednesday there’s a bottle of olive oil next to the stove, the bread bag has moved in by the kettle, someone’s phone charger is coiled next to the fruit, and the mail has found its way onto the only free corner. Nothing on its own is a problem. Together, it’s chaos.
Most kitchen countertop decor advice tries to fix this by adding things: a vase here, a pretty canister there. I think that’s backwards. My go-to trick is much simpler, and it makes even a small kitchen feel calm and cozy instead of crowded: everything that stays out on the counter goes on a tray, board or small stand, grouped by what it’s used for, with bare counter in between.
That’s it. That’s the trick.
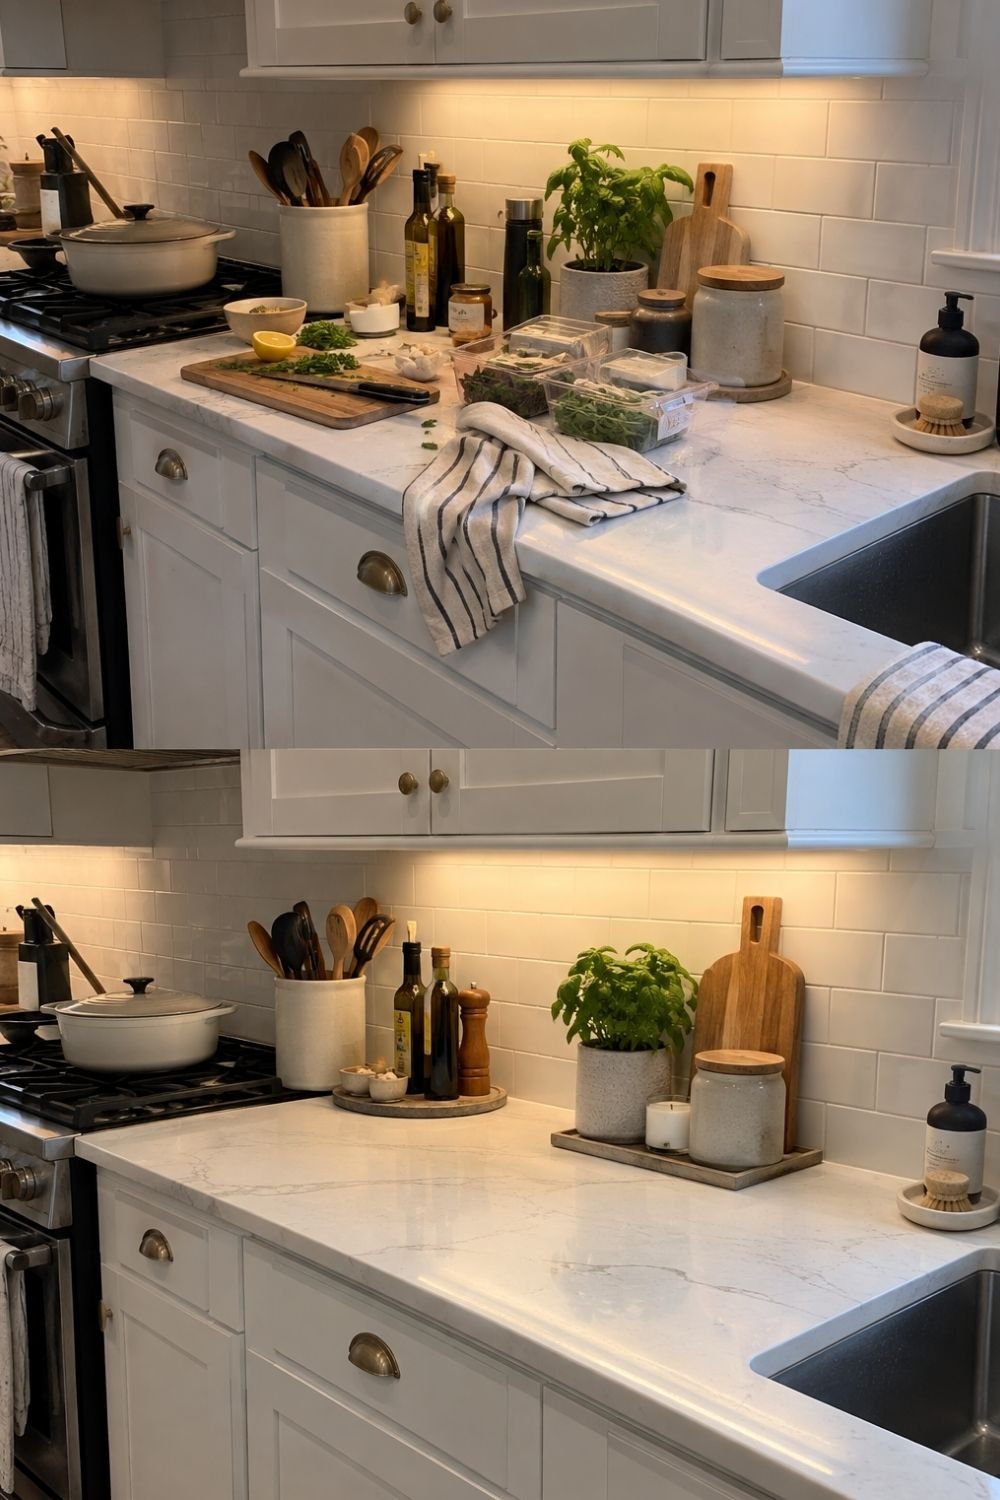
Photo by OurHoneyHome
The two frames above show the same counter before and after. In the top one, everything is technically in its place: a Dutch oven on the stove, a crock of wooden spoons, oil bottles, a potted basil, a cutting board with chopped herbs and half a lemon, two plastic containers of greens, a striped towel thrown across the edge. It still looks messy, because every object stands on its own.
In the bottom frame, almost nothing has left the kitchen. The oil bottles and pepper mill now sit together on a round wood tray with two little salt dishes. The basil, a candle and a stoneware canister share a second, rectangular tray, with the cutting board leaning behind them. The towel is gone, the containers are in the fridge, and there’s a long stretch of empty marble between the two groups. Same kitchen, same stuff, completely different feeling.
Why grouping works better than decorating
Good kitchen counter styling is mostly about how the eye reads a surface. When your eye lands on a counter with fifteen loose objects, it reads fifteen things. When those same objects sit in three groups, it reads three things. That’s the whole reason this works, and it’s why I’d always try grouping before buying a single new accessory.
A few other things happen when you group:
- Cleaning gets easier. You lift one tray, wipe underneath, put it back. No shuffling bottles around one by one.
- Clutter has an edge. A tray has a border. When it’s full, it’s full, and the next thing has to go somewhere else.
- Mismatched stuff looks intentional. A plain oil bottle, a random pepper mill and a jar of salt look like leftovers on their own. On a wood board, they look like a set.
- The empty space gets to do its job. A bare stretch of counter is where you actually chop, roll dough and put down grocery bags. It also happens to be what makes a kitchen look clean.
Step 1: Decide what earns a spot on the counter
Before any styling, there’s a less fun part, and it’s really just kitchen countertop organization: deciding what’s allowed to stay out. My rule is simple. If you use it every day, or almost every day, it can live on the counter. If you use it once a week or less, it goes in a cupboard.
Things that usually earn their spot:
- Cooking oil, salt and a pepper mill near the stove
- A crock of wooden spoons and spatulas
- The kettle or coffee machine you use every morning
- Dish soap and a brush by the sink
- A fruit bowl, if fruit actually gets eaten from it
- One cutting board you use daily
Things that usually don’t:
- The stand mixer you use twice a year (unless you bake constantly, in which case, keep it)
- Rarely used spices, extra oils and backup bottles
- Mail, keys, receipts and chargers
- Stacks of takeout menus and “I’ll deal with it later” paper
- More than one or two decorative pieces that do nothing
And yes, the toaster is allowed to stay. I’d much rather see a toaster that gets used every morning than a toaster-shaped gap and a daily trip to the back of a cabinet. The same goes for a coffee machine, a rice cooker or an air fryer, as long as it’s used often.
What about cables? Push appliances back against the wall so the cords run straight down behind them, and use a short cord or a small adhesive cable clip to keep them out of sight. A charging spot for phones is better off outside the kitchen or inside a drawer with a power strip.
Step 2: Split the counter into zones
Once you know what’s staying, group things by what they’re used for, not by what they look like. Most kitchens have three natural zones:
- The cooking zone next to the stove: oil, salt, pepper, utensils, a board.
- The coffee or tea zone wherever the kettle or machine sits: mugs, sugar, tea, a spoon rest.
- The sink zone: soap, brush, maybe a small plant that likes the humidity.
Everything in one zone goes on one base. Between zones, leave bare counter.
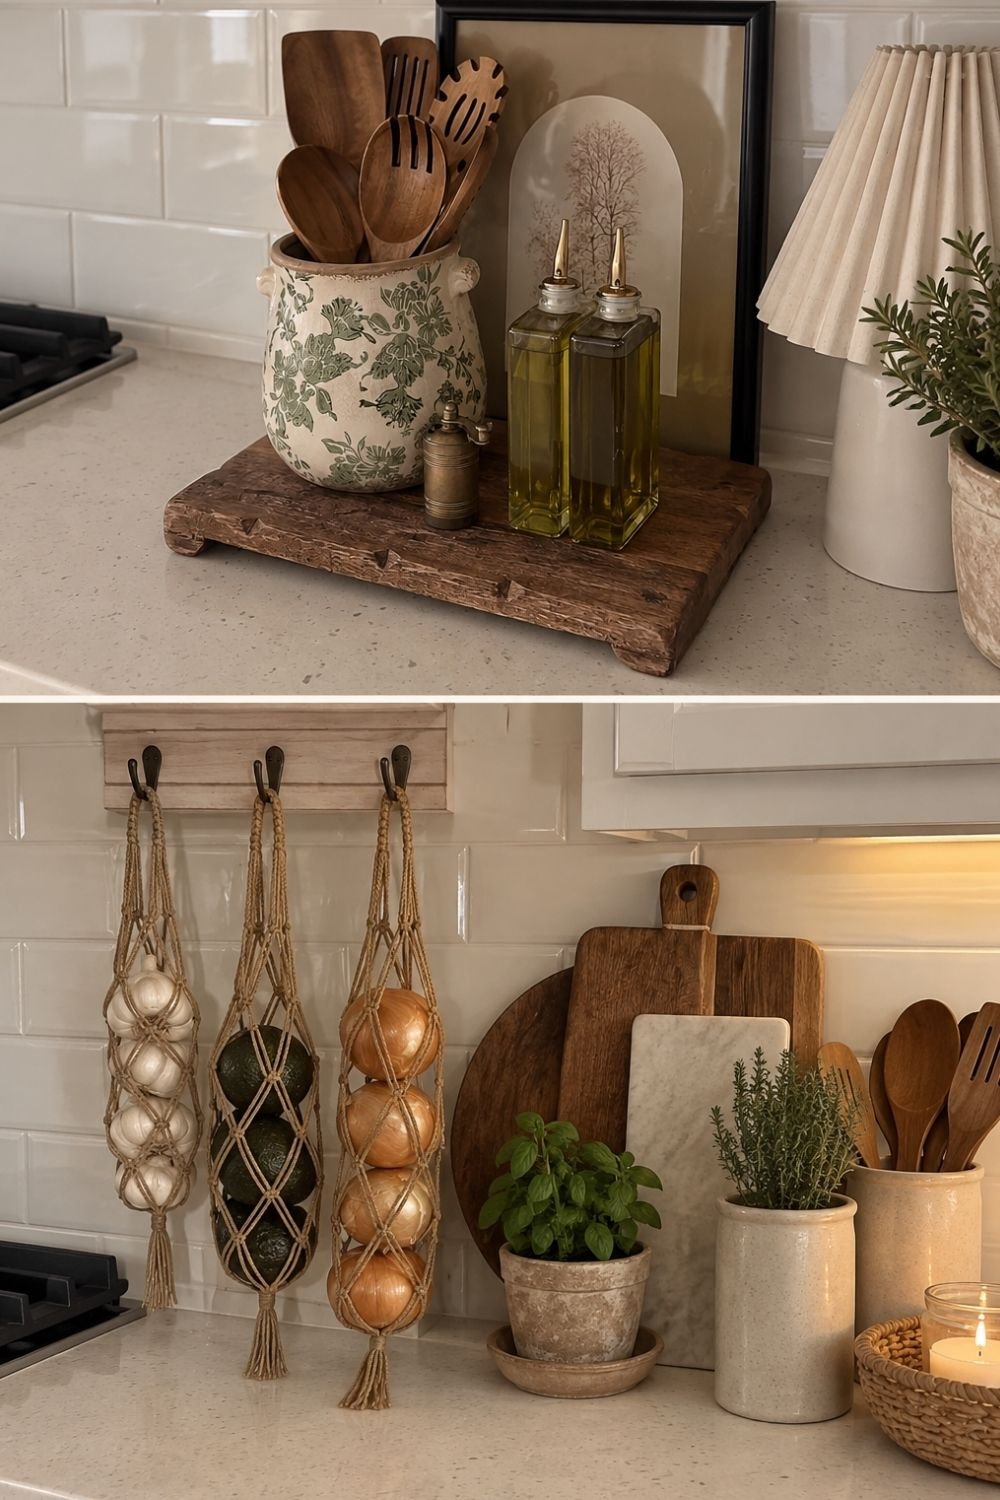
Photo by OurHoneyHome
The top frame is a cooking zone done in one move: a chunky reclaimed-wood riser holds a green floral crock of wooden spoons, a small brass pepper grinder and two glass oil bottles with gold pour spouts, with a framed botanical print leaning behind. A pleated lamp and a pot of rosemary sit just outside the group, so they don’t crowd it.
The bottom frame shows what to do when a zone runs out of counter: go up the wall. Macramé hangers on a simple hook rail hold garlic, avocados and onions, which would otherwise be rolling around a bowl. Next to them, cutting boards lean against the tile with a basil pot, a crock of thyme, a jar of spoons and a candle in a small basket. Nothing is loose.
The coffee zone works the same way.
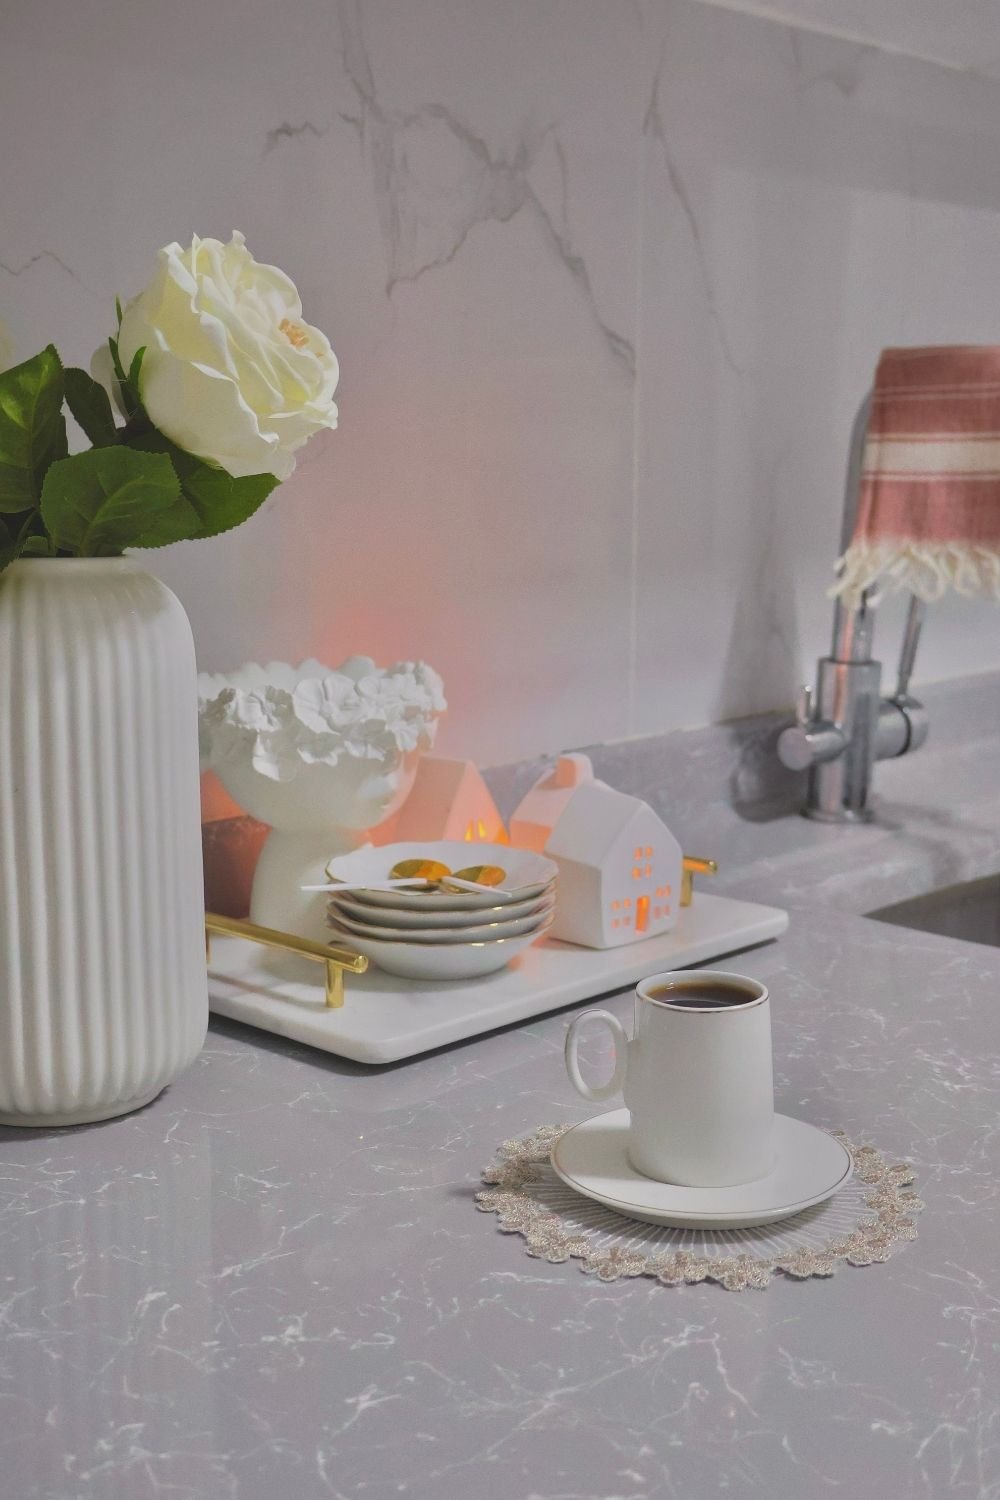
Here a white marble tray with gold handles holds a stack of small gold-rimmed plates, a ceramic house lantern and a sculptural planter. The coffee cup sits on a lace doily in front, and a ribbed white vase with a single rose anchors the corner. Everything coffee-related is on the tray, everything decorative sits right next to it, and the rest of the gray counter stays empty. If you have space for a whole station, the small coffee bar post goes much further.
If you cook from books, a cookbook corner can be a zone too.
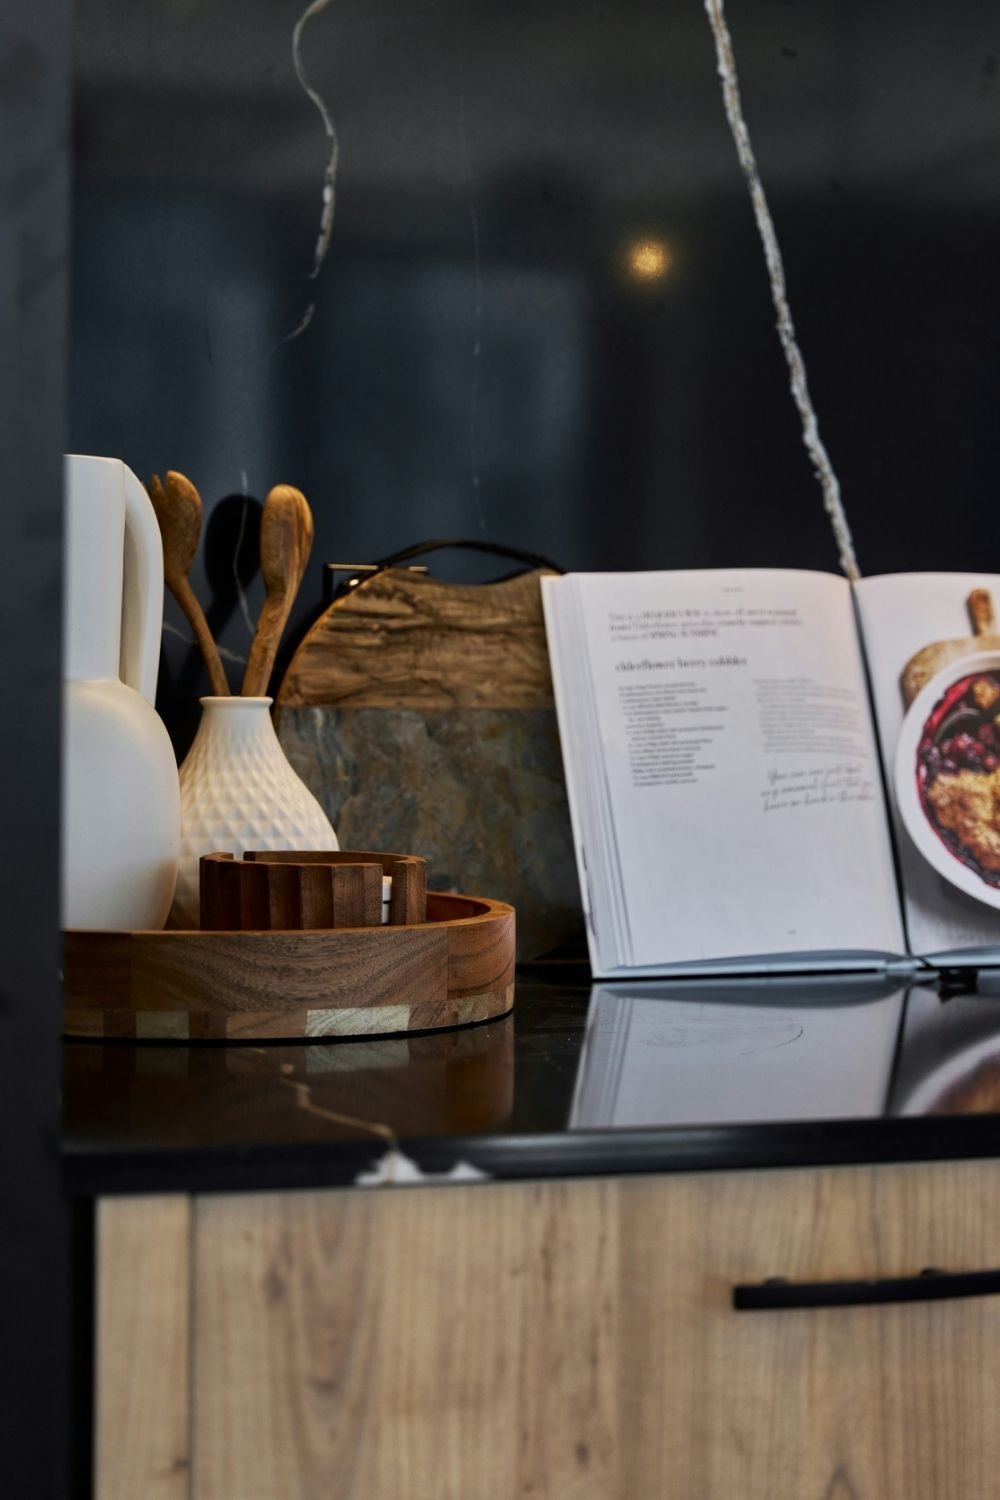
Photo by Panos Katsigiannis on Unsplash
On this dark stone counter, an open cookbook stands propped next to a round wood tray with a white jug, a small textured vase holding olive-wood spoons and a wooden coaster set. A stone-and-wood board leans behind. The book is the one “decoration” that’s also useful, which is my favorite kind.
Step 3: Give every group a base
This is the part people skip, and it’s the part that does the most. The best kitchen counter accessories aren’t decorations at all, they’re bases, and a base is anything with a flat top and a clear edge:
- Trays: wood, marble, metal, rattan. Round ones soften a counter full of straight lines; rectangular ones fit neatly against a backsplash.
- Cutting boards: lay a large one flat and use it as a tray, or lean one or two against the wall as a backdrop.
- Risers and pedestals: small footed stands lift a group a few centimeters, which instantly makes it look more deliberate.
- Cake stands: great for soap and a brush by the sink, or a few pieces of fruit.
- Plates and shallow bowls: a vintage plate under an oil bottle catches drips and looks nicer than a paper towel.
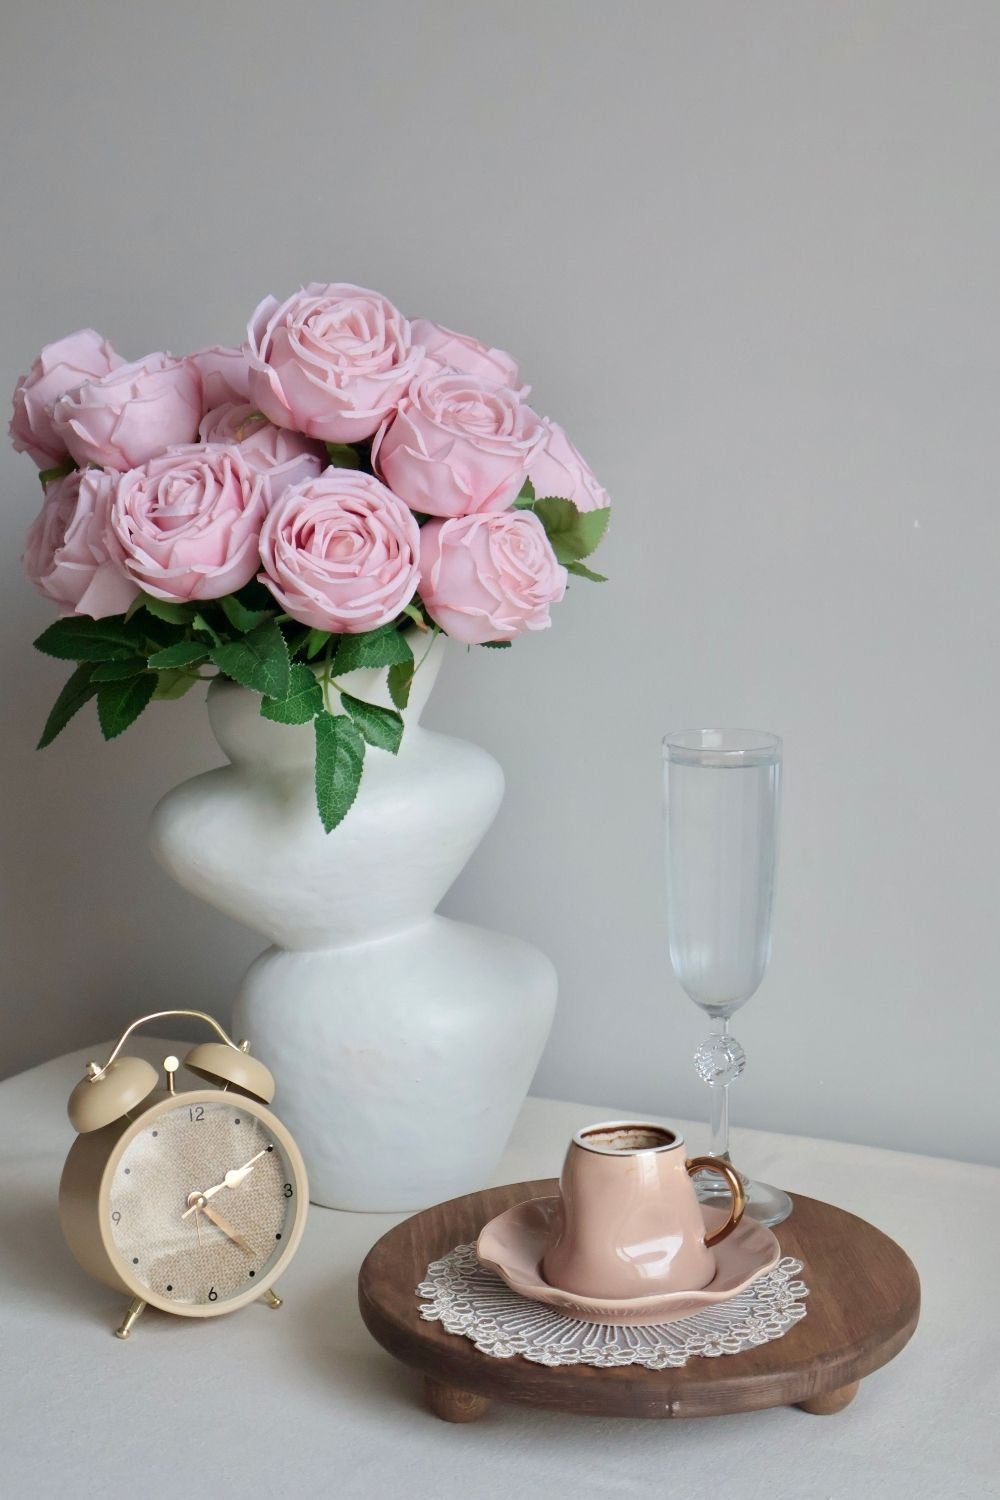
The footed wood stand above shows how much height a riser adds. A pink coffee cup and saucer on a lace doily would disappear on a flat counter; lifted a few centimeters, it becomes a small still life, with a vase of pink roses, a tall glass and a little alarm clock around it.
Inside each group, think in heights: something tall at the back (a board, a crock of spoons, a plant), something medium in the middle (bottles, canisters), something low at the front (a salt dish, a small bowl). Three heights, and odd numbers of objects, usually look more natural than two identical pieces side by side.
Step 4: Add one living thing and one soft light
Once the working groups are set, I’d add exactly two things that aren’t strictly useful: something alive and something that glows.
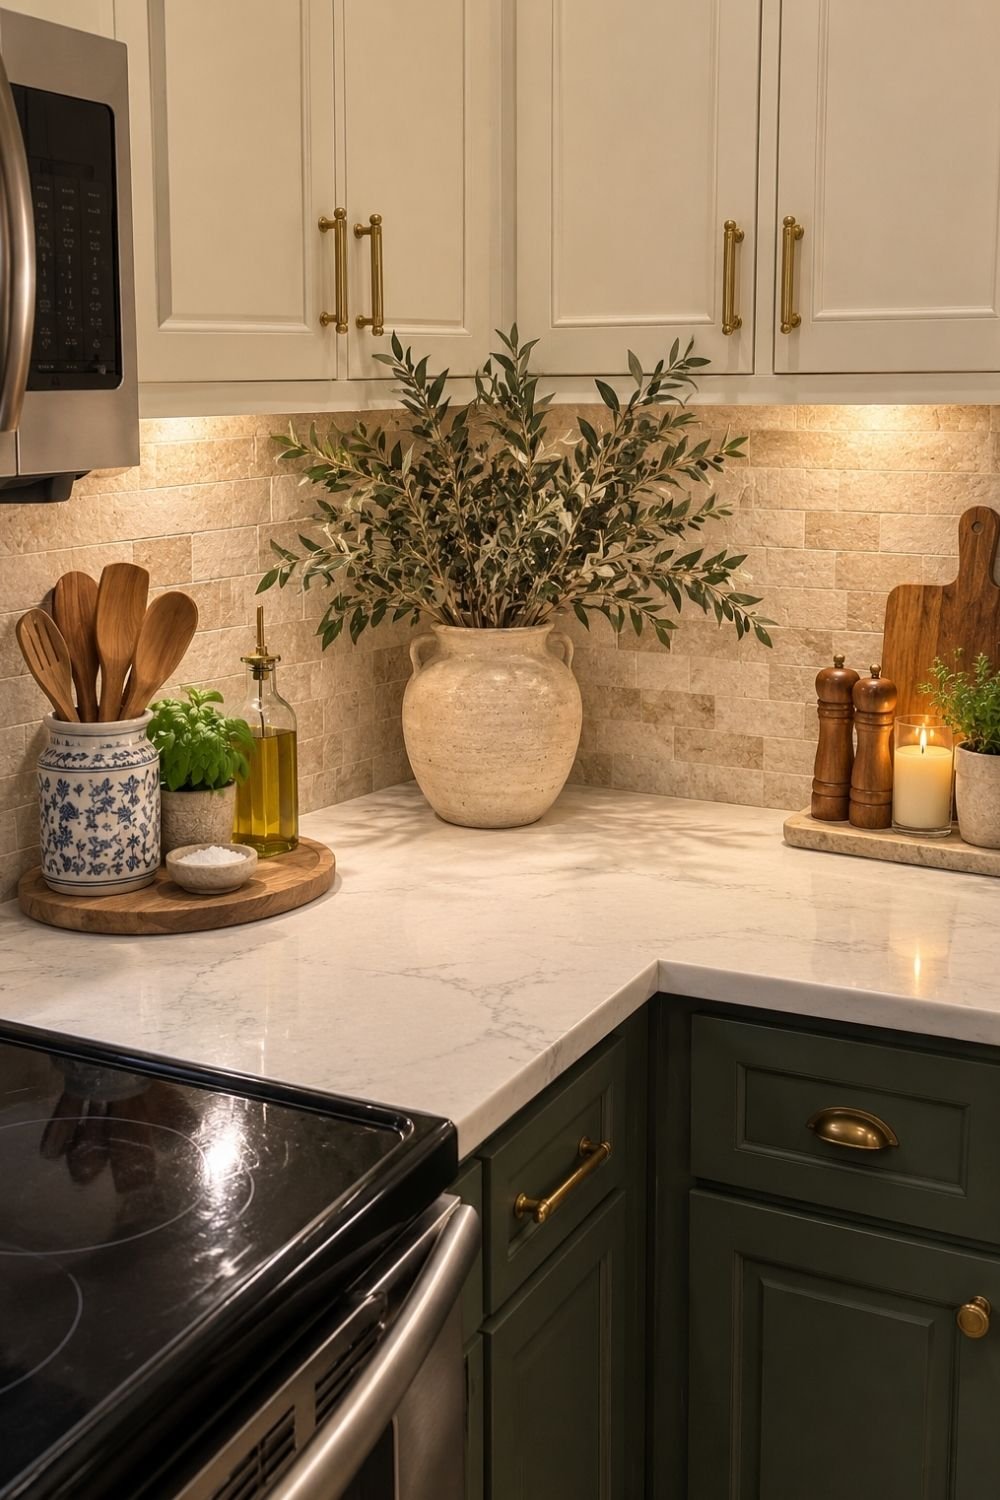
Photo by OurHoneyHome
This corner shows both. A large cream jug full of olive branches fills the dead corner where two counters meet, a spot that’s awkward to work in anyway. On the left, a round wood board holds a blue-and-white crock of spoons, a basil plant, an oil bottle and a salt dish. On the right, a stone tray holds wooden salt and pepper mills, a lit candle and a small herb pot, with a cutting board behind. Under-cabinet lights wash down the stone backsplash, and the whole thing looks warm without a single extra decoration.
- Plants: herbs like basil, thyme and rosemary look good and get used. Olive branches, eucalyptus or any cut greenery in a heavy jug last a long time.
- Flowers: a small bunch from the grocery store in a jug or pitcher is the easiest seasonal update there is.
- Light: under-cabinet LED strips make a bigger difference than almost any accessory. A small cordless lamp on the counter is a nice second layer. A candle is fine too, just not right next to the stove or the paper towels.
What if your counter is tiny?
Small counters benefit from this trick the most, because every centimeter of free surface counts. Most kitchen counter decor ideas for tiny kitchens come down to the same few moves:
- Pick one tray, not three. Put the true daily items on it (oil, salt, pepper, spoons) and let everything else find a cupboard.
- Go vertical. A rail with hooks for utensils, a magnetic knife strip, a narrow shelf above the counter or hanging produce baskets all clear the surface.
- Use the windowsill for herbs, if there’s one near the sink.
- Lean, don’t lay. A cutting board leaning against the backsplash takes up almost no counter space and still reads as decor.
- Skip the fruit bowl if it takes up the only free spot. A hanging basket does the same job.
Minimalist or layered?
The grouping trick works for both kinds of kitchen countertop decor. The only thing that changes is how full each group gets.
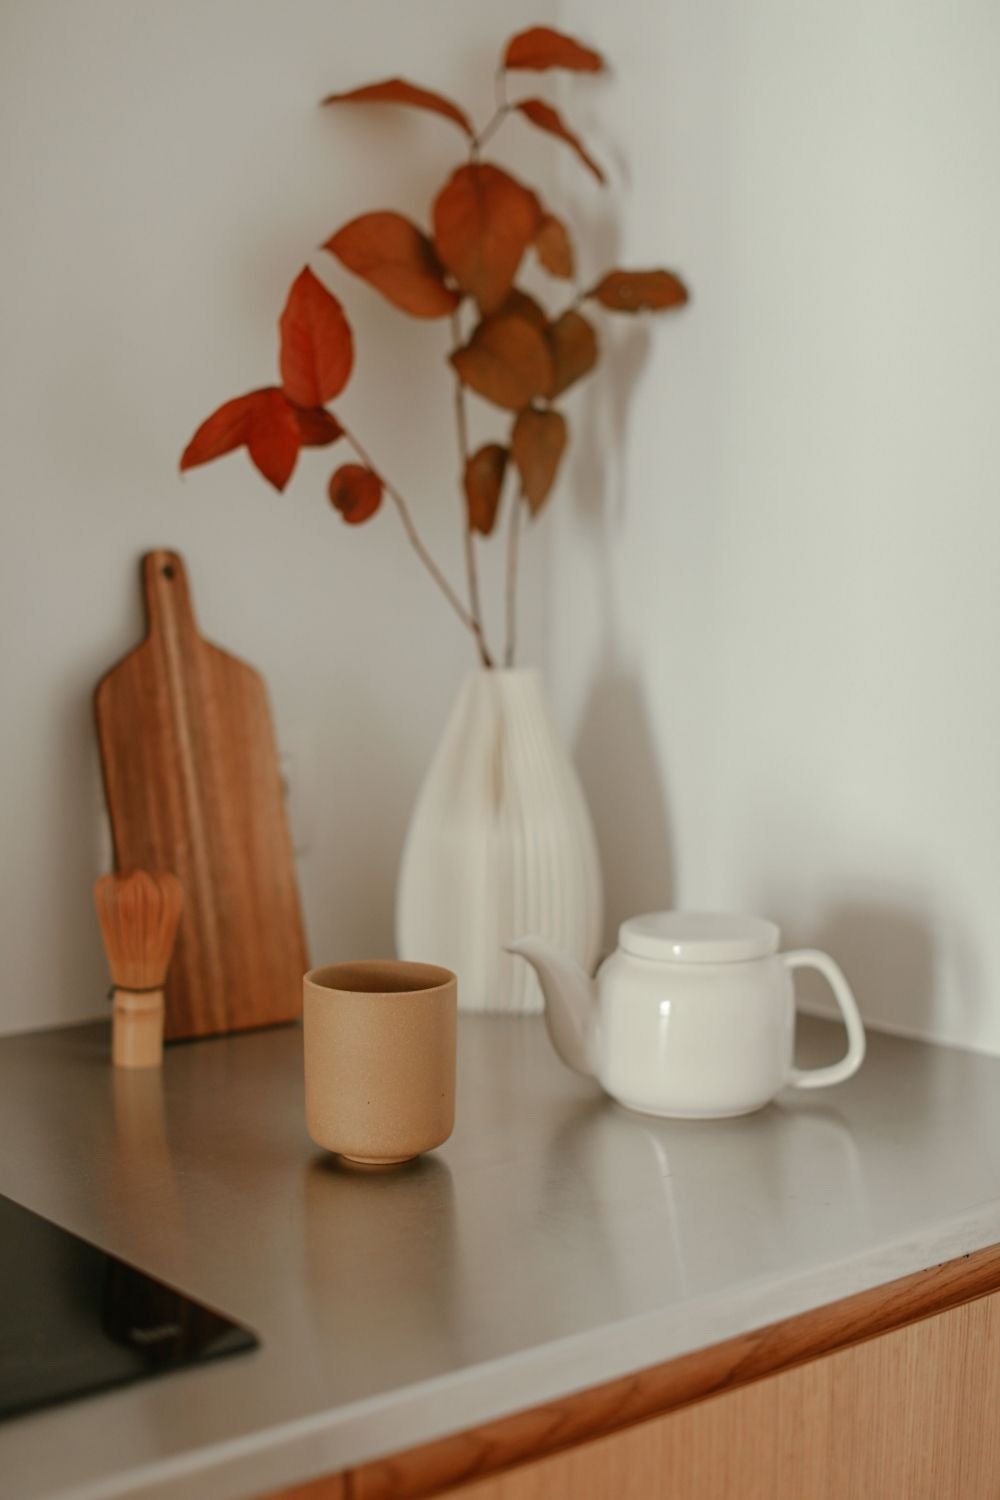
Photo by Cup of Couple on Pexels
Minimalist means one small group per zone, and very few pieces in it. Above, a white teapot, a tan ceramic cup and a matcha whisk sit on a stainless steel counter, with one wood paddle board leaning against the wall and a single white vase of rust-colored branches in the corner. Five objects, one color family, lots of empty steel. It’s quiet, and it’s still clearly a kitchen someone uses.
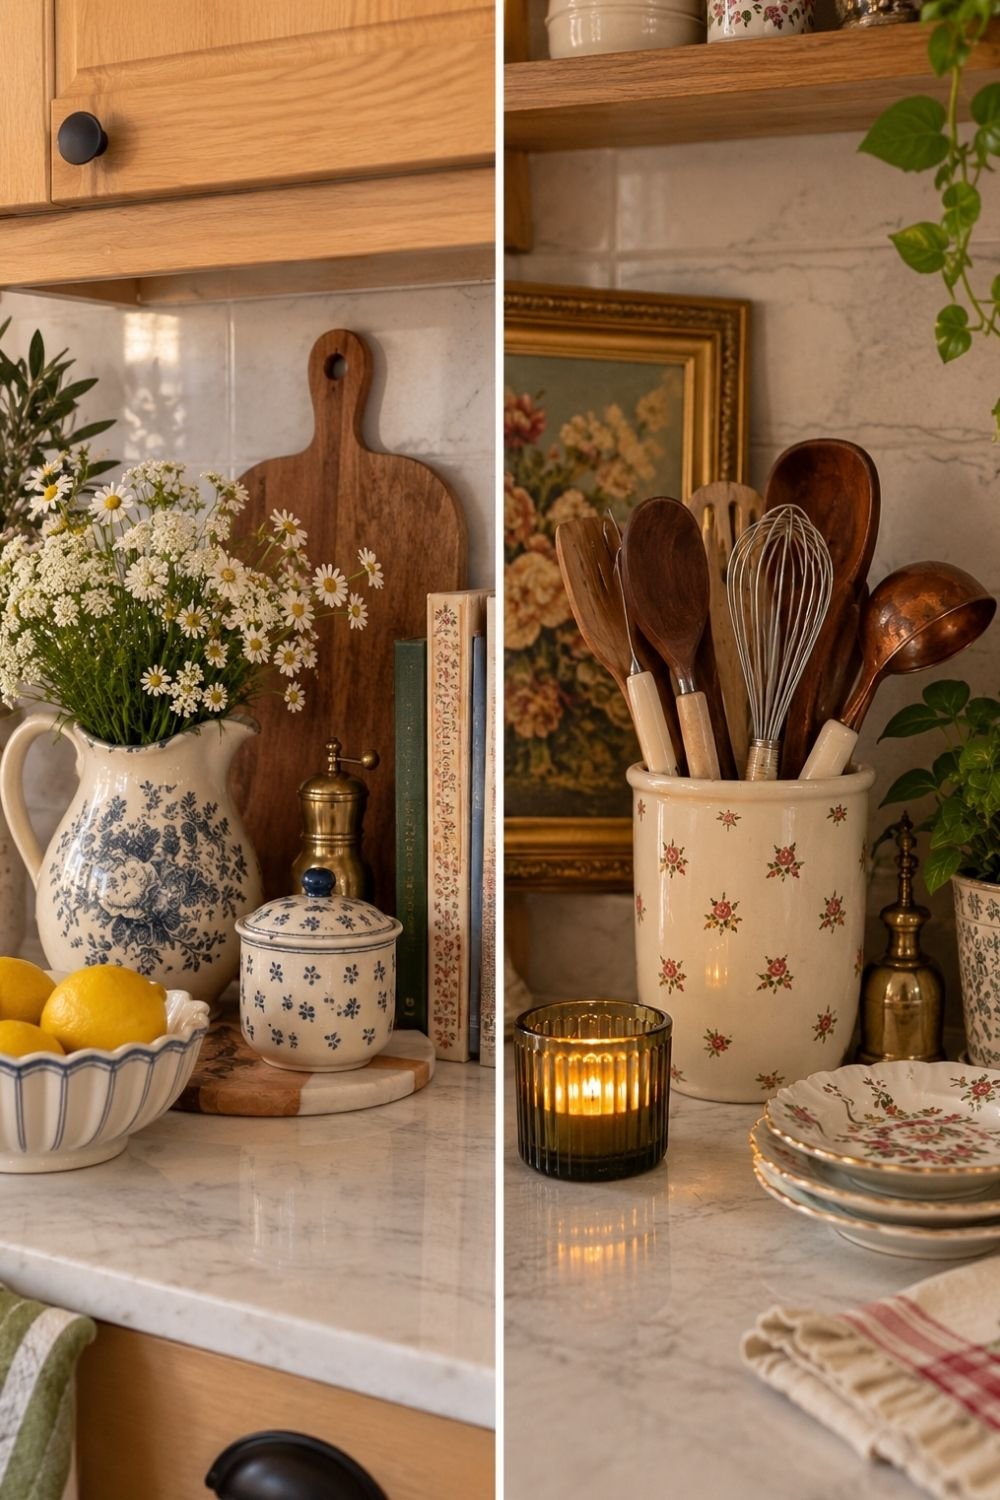
Photo by OurHoneyHome
Layered means fuller groups with more pattern, but still grouped. On the left, a blue-and-white floral pitcher of daisies, a scalloped bowl of lemons, a lidded sugar pot, a brass pepper mill, a few cookbooks and a wooden board all cluster together on a marble board. On the right, a rosebud-print utensil crock, a stack of gold-edged floral plates, a ribbed green votive and a gold-framed floral painting lean into each other, with a trailing plant above. It’s busy on purpose, and it works because the pieces share colors and sit in tight groups rather than spread across the whole counter. If this is your style, the grandmacore kitchen ideas have a lot more to borrow from, and there’s a moodier version in the dark cottagecore kitchen post.
Seasonal accents without starting over
A nice side effect of working with trays is that seasonal kitchen counter decor becomes a two-minute job. The base stays, the working items stay, and only one small thing on each tray changes.
- Fall: a small pumpkin or a few pears, dried branches in the jug, a cinnamon-scented candle.
- Winter: pine or eucalyptus stems, clementines in the bowl, a brass candlestick.
- Spring: tulips or daffodils in a pitcher, a pot of chives.
- Summer: lemons, a bunch of wildflowers, fresh basil.
I’d resist adding seasonal pieces on top of everything else. Swap, don’t stack, and the counter keeps its breathing room all year.
So, one more time, the whole trick
That’s the whole of my kitchen countertop decor approach: keep only what you use often, group it by zone, put each group on a tray or board, and leave bare counter in between. Then add one plant and one soft light, and stop. It sounds almost too simple to count as a styling trick. But in my opinion, that’s exactly why it lasts: a counter that’s easy to keep tidy is the only kind that stays looking good past Wednesday.
