A collection stops reading as a collection around the point it spreads. Ten small things on a windowsill look deliberate. The same forty things scattered across a windowsill, two bookshelves, the top of a dresser and a bowl by the door look like mess, and the advice at that stage is always to thin them out.
I think that’s the wrong instinct, and it’s why so many boxes of figures end up back in the wardrobe.
The number of objects is rarely the problem. The problem is that nothing is holding them. Give the same forty things one frame and they stop being forty things, because the eye reads the frame first and the contents second. Almost every one of the trinket shelf ideas below is really just a different way of drawing that boundary, and most of them cost less than a shelf.
Give them an edge and they stop being clutter
The simplest version is a compartment unit where each object gets its own box.
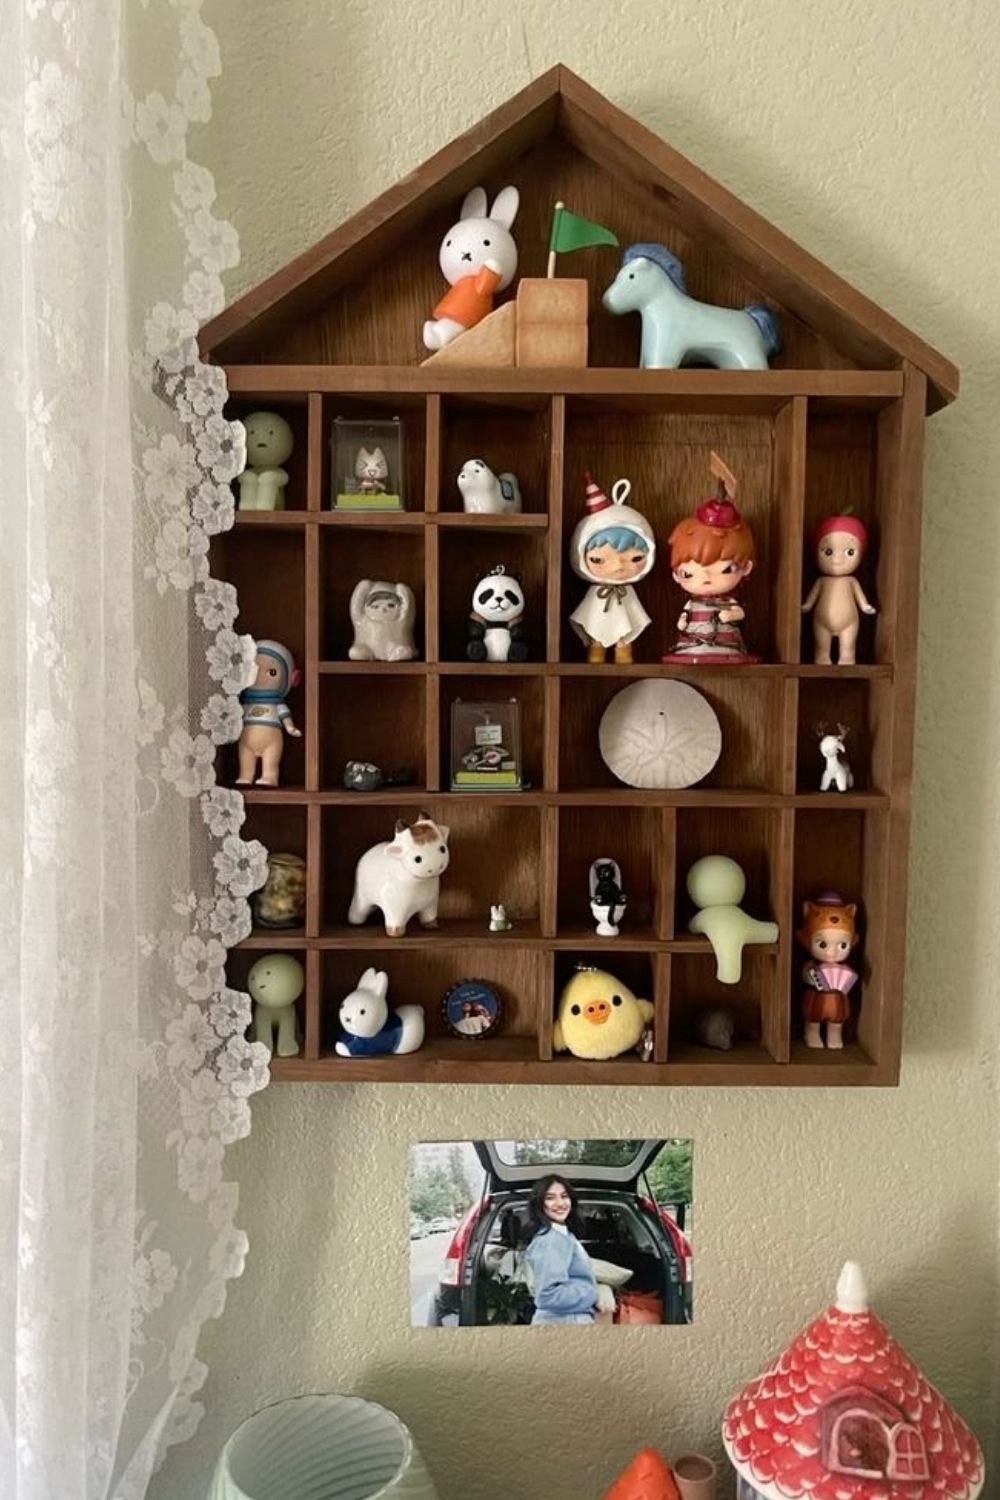
Photo by OurHoneyHome
The house-shaped shelf above holds well over twenty small figures: blind box characters, a ceramic cow, a panda, a rabbit, a tiny deer, a plush chick, a bottle cap badge. Nothing in there matches anything else. Different brands, different materials, different scales, different colors.
It works anyway, because every single item sits inside a ruled wooden box, and the grid does the organizing that the objects never could. The few larger pieces go on the open ledge at the top, where the roof gives them somewhere to be.
That’s the entire principle of a figure display shelf. You are not curating the objects. You are curating the container, and letting it impose order on whatever goes in.
It’s also why curated clutter works as a look at all. The word curated suggests someone chose carefully, but in practice the choosing happens at the level of the shelf, not the shelf’s contents.
One material holds together what one theme can’t
The second thing that makes a wall of small objects work is a shared backdrop. If the shelf itself is loud, the collection has to compete with it.
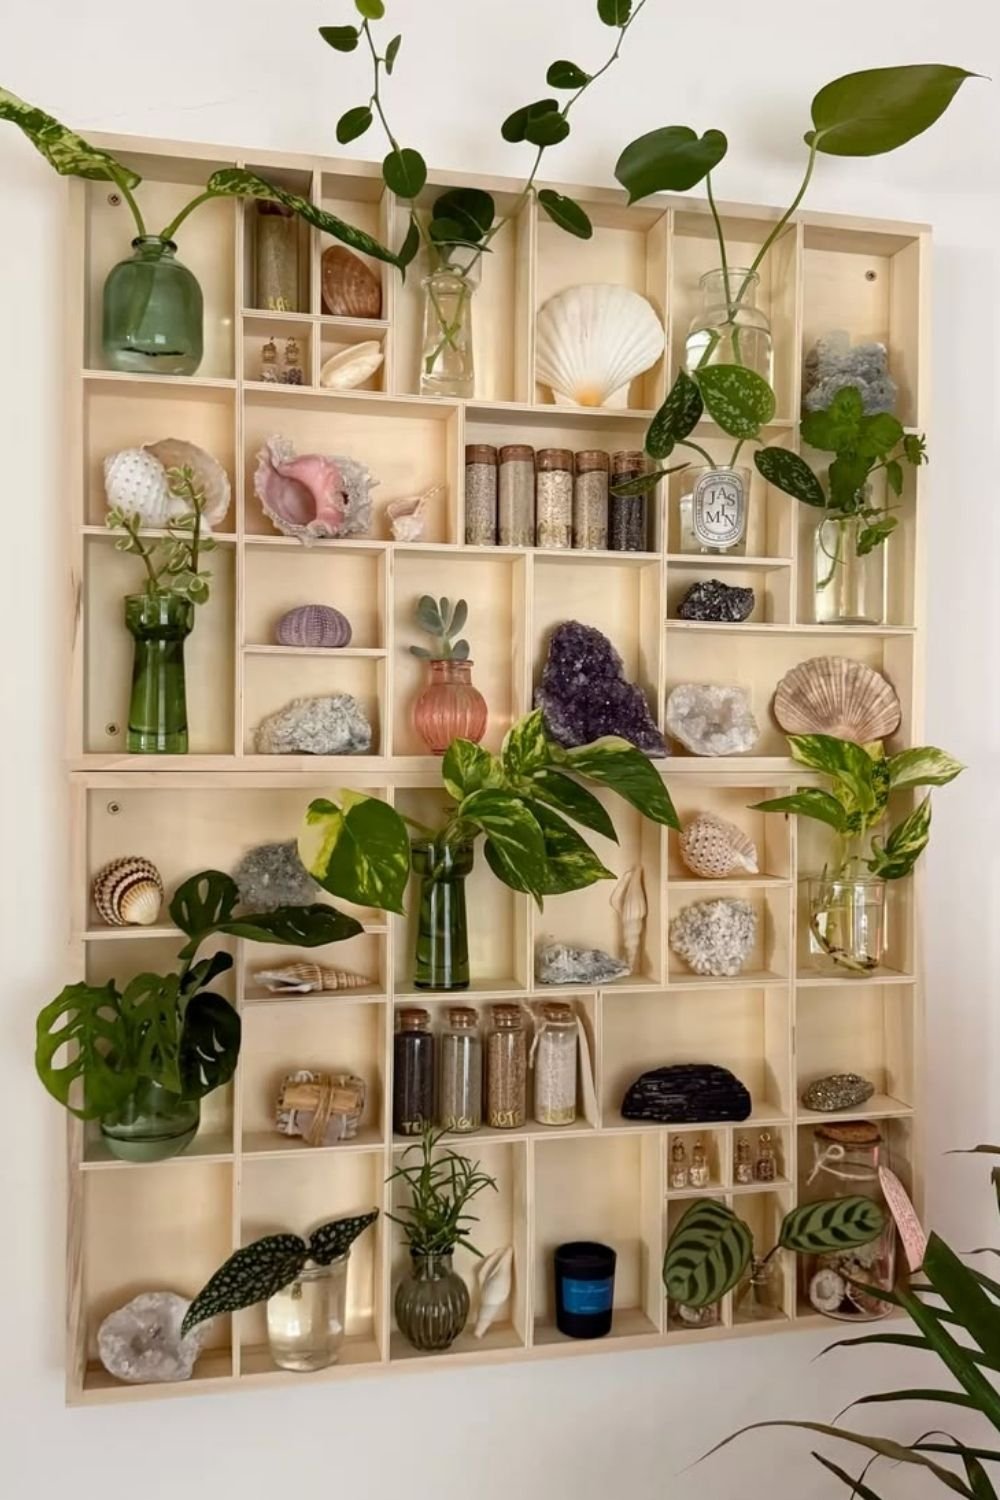
Photo by OurHoneyHome
This one is bare plywood, unfinished and unpainted, in a grid of irregular compartments. What’s in it has no business hanging together: scallop shells, a purple sea urchin, amethyst and pyrite chunks, corked vials of sand from different beaches, a couple of small candles, and glass jars of trailing cuttings threaded through half the boxes.
Pale raw wood is doing the work. It’s quiet enough to disappear behind the shells and warm enough that the whole wall still looks like something rather than storage. Painting it white would flatten the shells; staining it dark would swallow them.
The cuttings are the touch I’d copy first. Live plants growing out of a static display keep it from looking like a museum case, and they change it slowly over months. If you like that idea, it pairs well with a proper propagation station nearby.
The cardboard version costs nothing and doesn’t look it
You do not need to buy a unit for any of this. The cheapest one here is made of packaging.
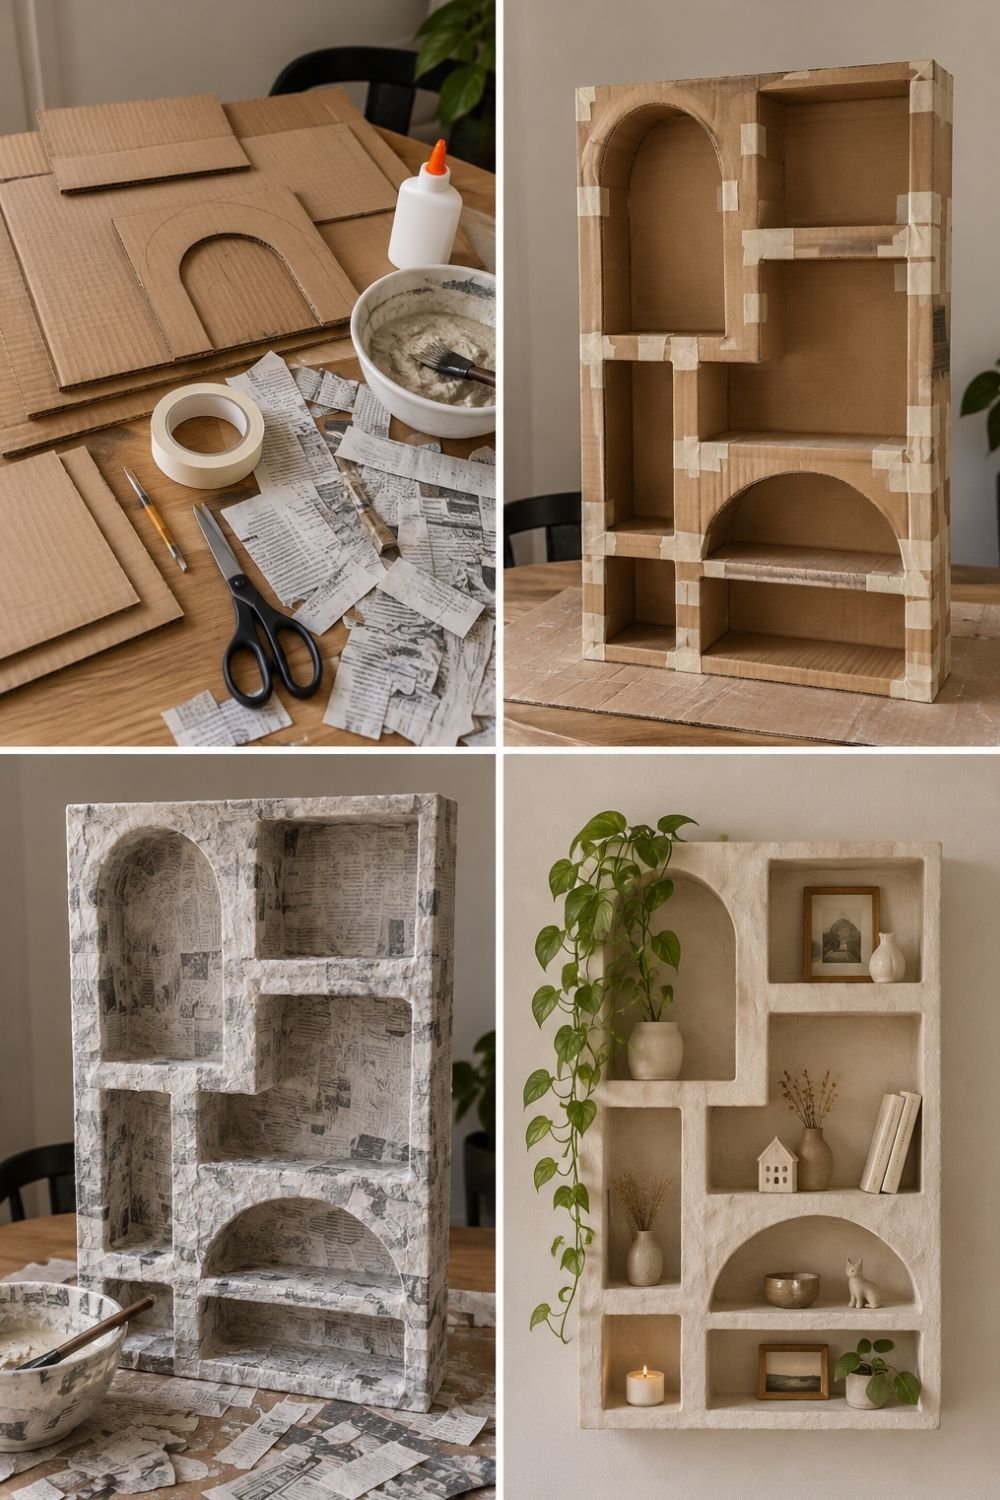
Photo by OurHoneyHome
The frames above go from flat cardboard panels, a craft knife, masking tape and a bowl of paste through to a finished wall piece. The arch is cut out of one panel, the boxes get taped together into a lopsided grid, then the whole thing is covered in torn book pages and paste until the seams disappear. Two coats of matte paint later it reads as carved plaster.
Hung on the wall in the last frame it holds a pothos in a stoneware pot, dried stems in small vases, a tiny ceramic house, a wooden bowl, two books, a candle and a pair of framed prints. Nobody looking at it would guess what it’s made from.
Keep the arch. A single curved opening among straight boxes gives a homemade piece a shape it wouldn’t otherwise have, and it’s the part that makes it look designed rather than assembled.
Craft wood for a small one, plywood for a wall of it
If you want something more durable, the same idea scales in two directions depending on how much you’re displaying.
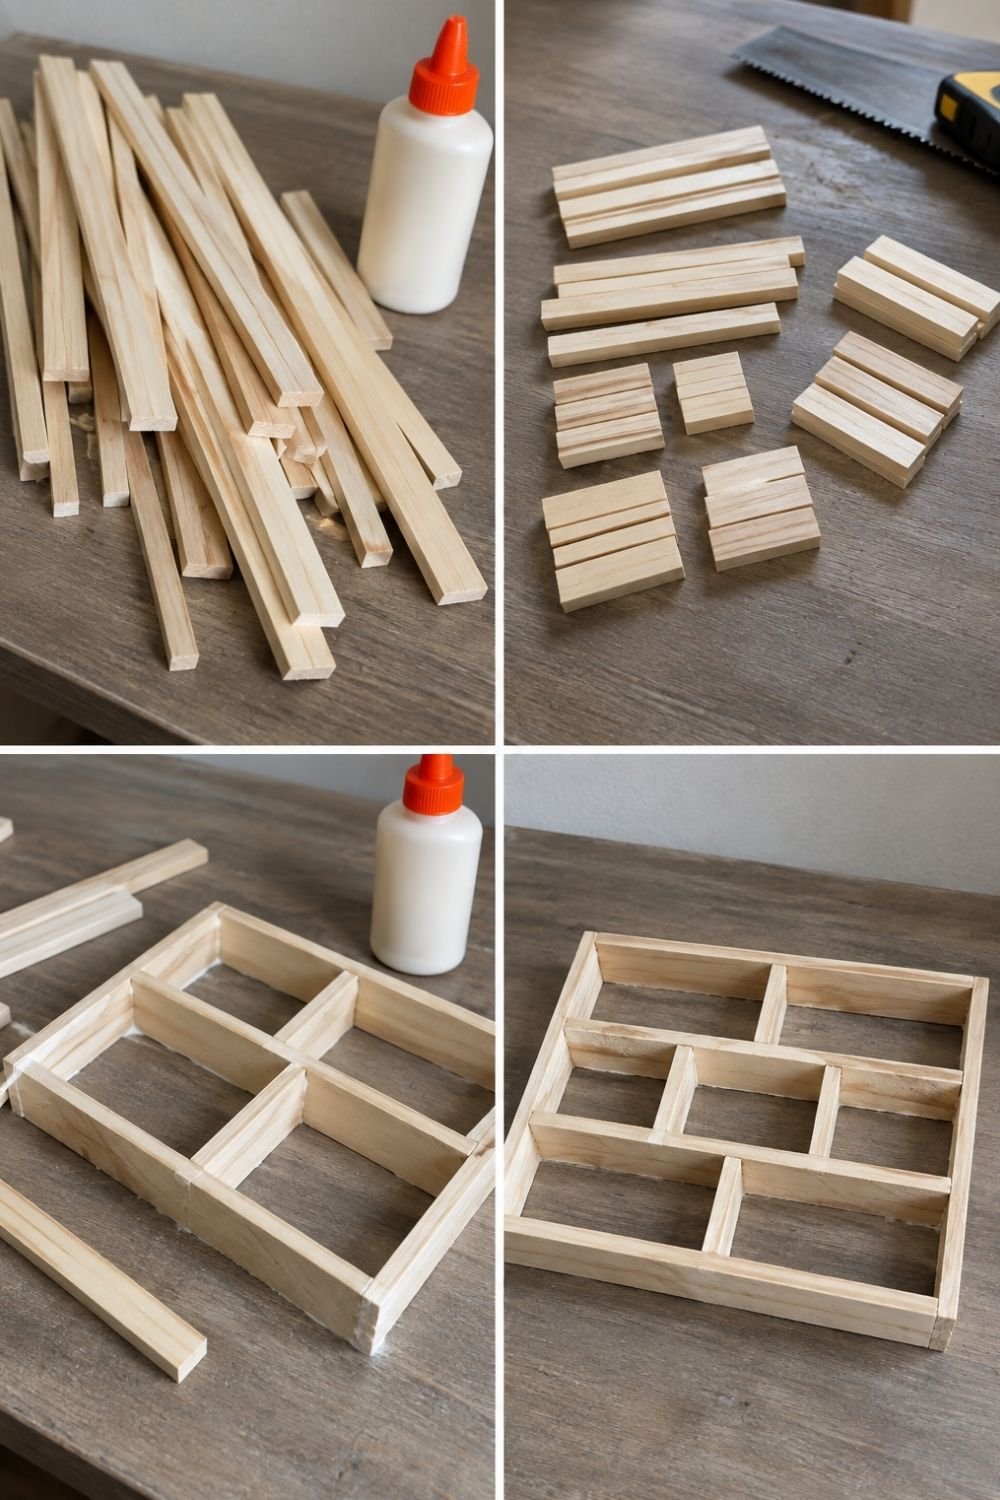
Photo by OurHoneyHome
Small first. A bundle of square-section craft strips from the hobby shop, cut into lengths with a hand saw and glued into a rectangle with dividers across it. No joinery, no screws, just wood glue and patience while it dries flat on the table. The finished tray is maybe 25 cm across and it sits on a desk holding rings, coins, dice or pins.
That size is the one I’d start with, because if the proportions come out wrong you’ve lost an afternoon and about the price of a coffee. It’s also the format I’d use for a coin collection display, since coins need shallow compartments and a lid you can lift rather than a deep box on a wall.
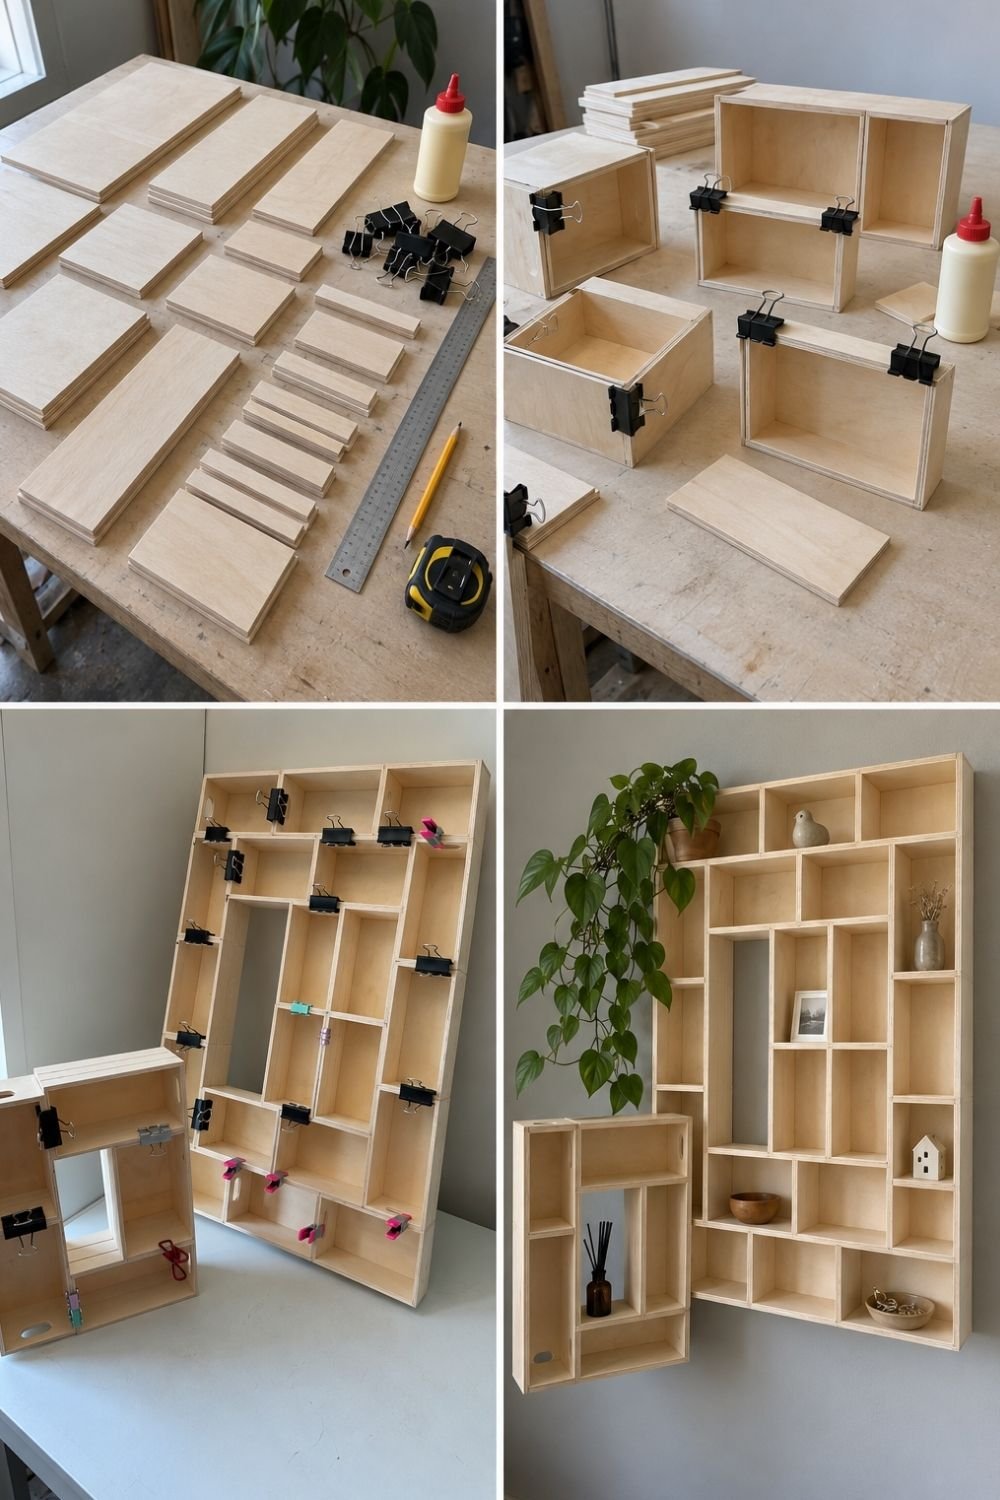
Photo by OurHoneyHome
The large version is the same method in plywood. Sheets cut to size, glued into open boxes, clamped with bulldog clips while they set, then the boxes are glued to each other into one irregular grid and hung as a single panel. The second, smaller unit beside it uses up the offcuts.
Building it as separate boxes rather than one carcass with dividers is what makes it achievable, because every joint is a simple right angle and nothing needs to be cut precisely to fit inside anything else.
It also means you can size individual boxes to what you own. Two or three compartments cut at 33 cm square turn the same panel into a vinyl collection display, with the records face out among the smaller boxes rather than filed away in a crate.
A clay one, for the objects that live on the desk
Not everything belongs on a wall. Some collections are small enough to want holding.
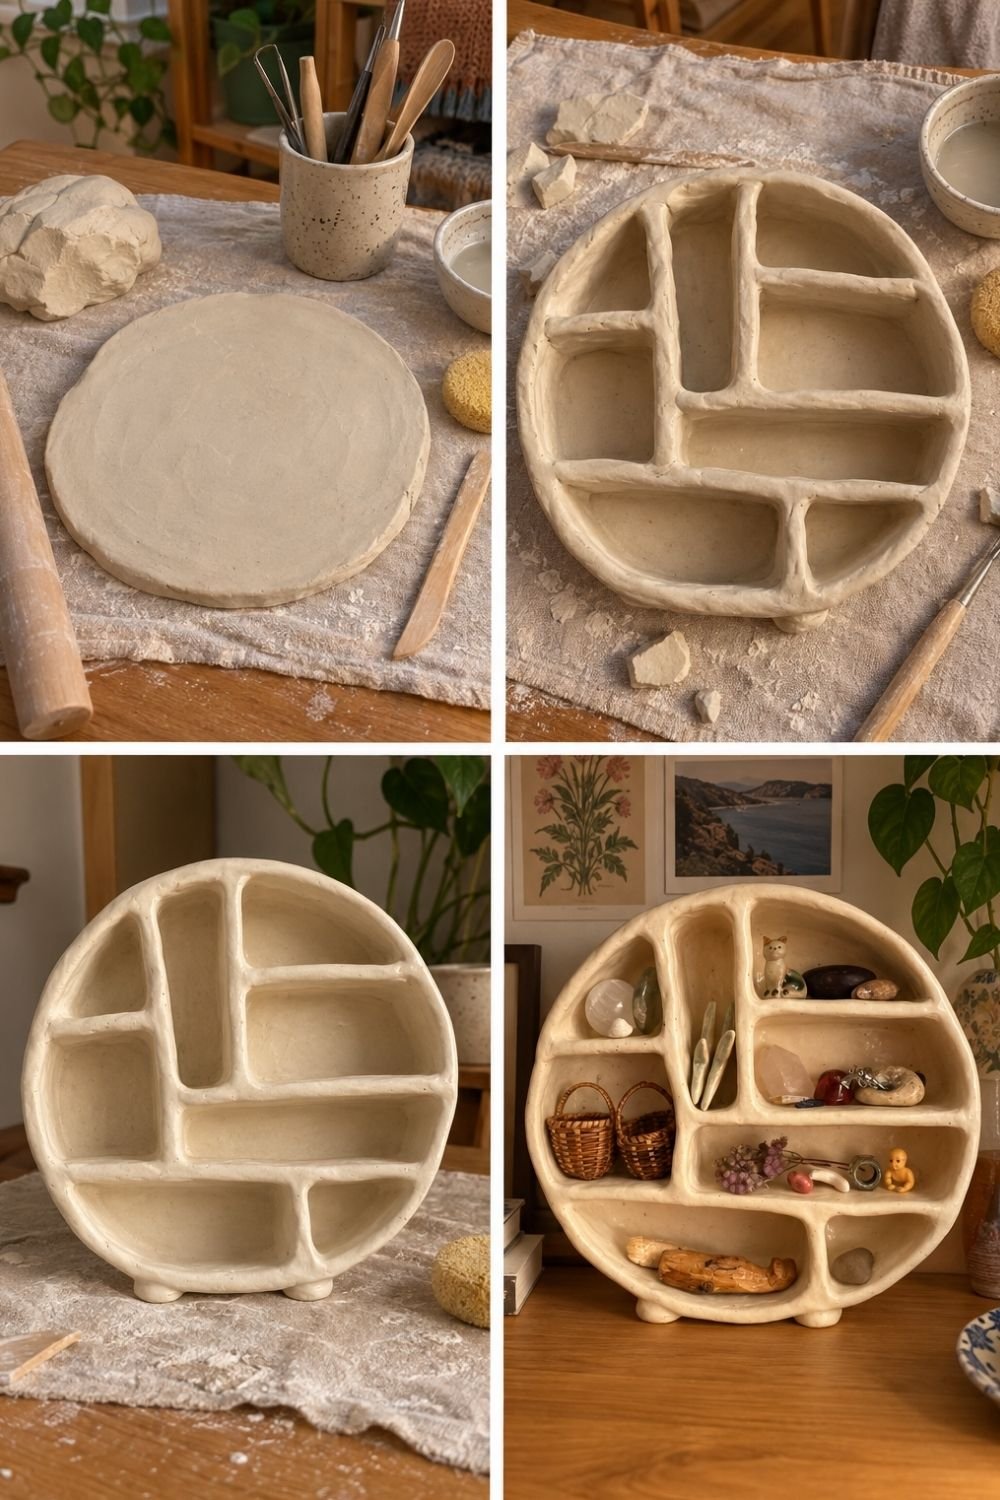
Photo by OurHoneyHome
This one starts as a rolled slab of clay cut into a circle, with coils pressed on as walls and dividers and three small feet added underneath. Fired plain, no glaze. The last frame shows it propped upright on a desk holding rose quartz, a small cat figure, two miniature baskets, a piece of driftwood, a ring and a handful of pebbles.
The round outline is the whole appeal. A circle full of straight compartments looks intentional in a way a square one doesn’t, and it turns a desk full of odds and ends into a single object you can pick up and move when you need the space.
Two things you probably already own
The last two aren’t built at all. They’re objects doing a job they weren’t sold for.
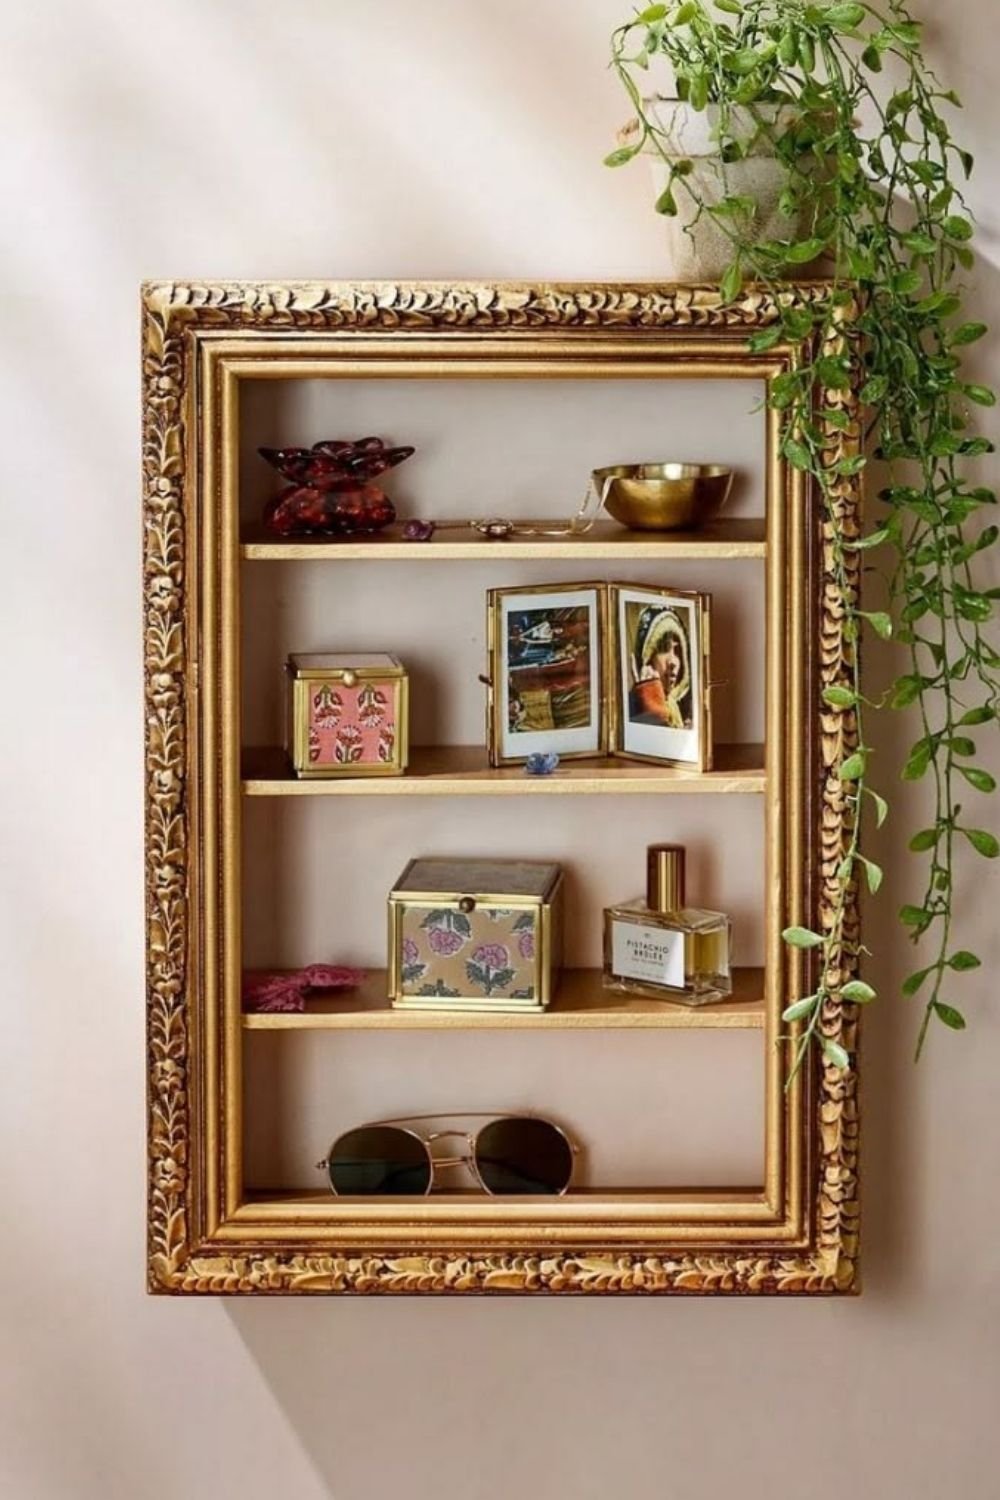
Photo by OurHoneyHome
An ornate gilt picture frame with four thin shelves fitted inside it becomes a display case for the small valuable things. Here that’s an amber glass dish, a brass bowl, a couple of rings, two little enamel boxes, a folding brass photo frame, a bottle of perfume and a pair of sunglasses. The heavy carved frame gives eight ordinary items the air of something worth looking at, which is exactly the trick.
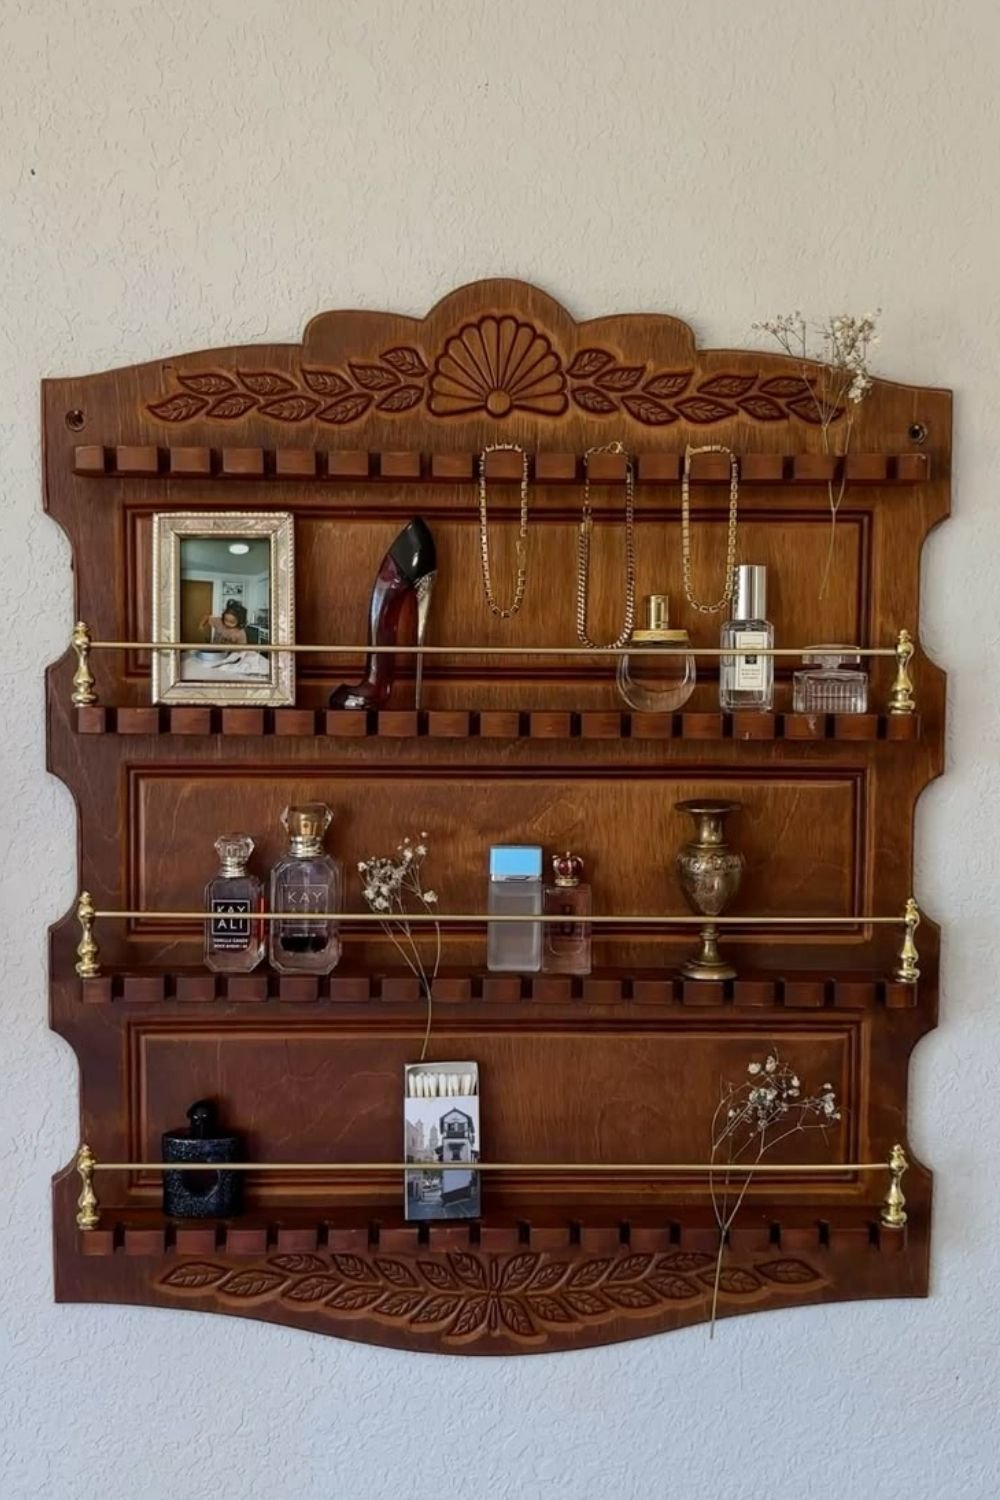
Photo by OurHoneyHome
The second is a carved wooden plate rack from a charity shop, the kind with brass rails and rows of pegs along each shelf. It now holds perfume bottles along the rails, with necklaces hung from the pegs and dried gypsophila tucked into the corners.
A vintage trinket shelf like this is usually the cheapest thing in the shop, because nobody wants a plate rack. The rails are the useful part: they keep bottles upright and stop anything walking off the edge.
What doesn’t fit
Not everything will make it onto the wall, and that’s fine. What I’d do with the rest is keep them in one labeled box and swap a few pieces in every couple of months, rather than trying to display all of it.
Twenty things in a grid look like a collection. Sixty things crammed into the same grid look like a shop. The box isn’t a defeat, it’s the other half of the display, the same way a folder of pressed flowers is the other half of the three you framed.
So before you put the trinkets back in storage, build the frame first. It’s usually the thing that was missing.
